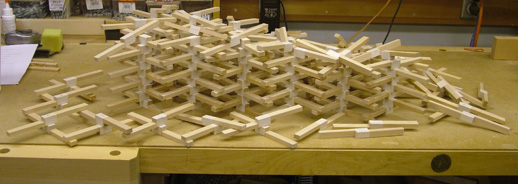
| Big Data |
|
|
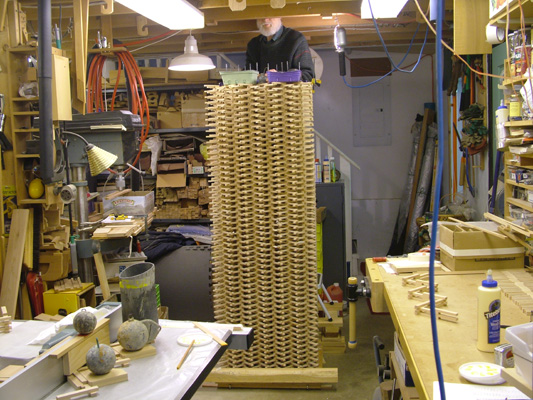
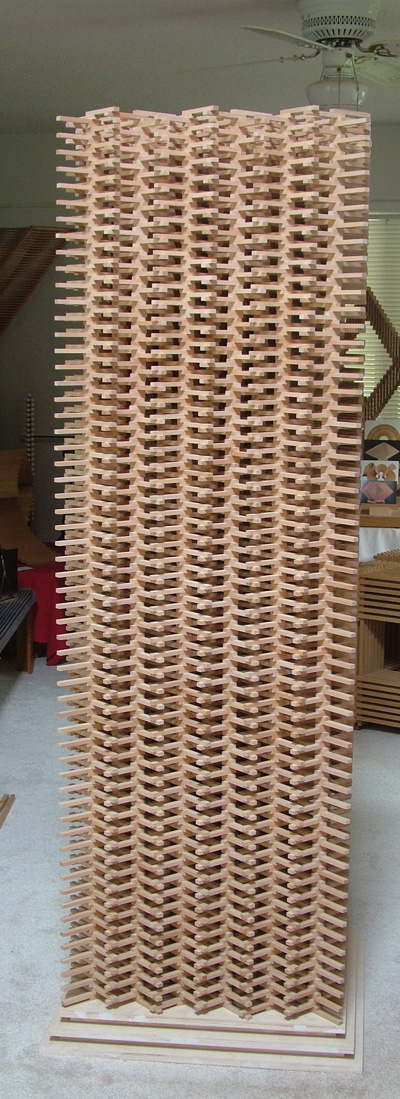
Big Data, in this photo, is nearing completion of its form, but besides layers being glued and aligned under lead weights. there are still many details to do yet, e.g. devising a transportation method to get it up to the studio, making sure the base's black paint doesn't turn into glue, photographing the sculpture, and finding a way to transport it horizontally. |
| The beginning |

|
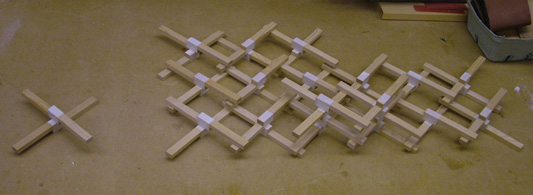
My sculptures often start with many possible ideas for the basic layers to repeat. This little 32 unit model made it easy to try different arrangements to repeat and, using masking tape instead of glue to join units, made it very easy to experiment. |
| Four Piece Unit |
|
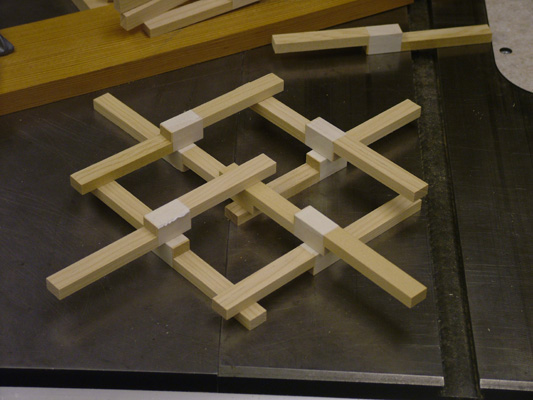
Four-piece units worked but they were hard to assemble into sculptures because the elementary shape had four levels, with parts that had to be slid under the existing sculpture while other parts had to go on top or be squeezed in between. Plus, while experimenting, two unit pieces didn't assemble well with masking tape into four unit sections. |
| Eight Unit Strips |

|
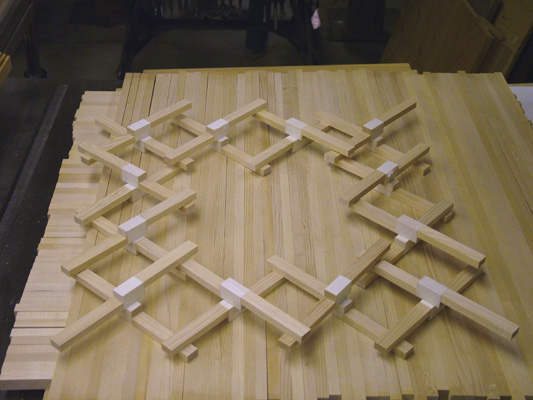
Temporary zig-zag strips were easy to to make with masking tape and dry stacking, plus the strips were easy to assemble into layers. The ones in the photo are 8-unit strips, but Big Data was assembled with 12-unit strips to make a more stable sculpture, one that could be made taller. |
| Sixteen Unit Double Layer |
|
After taping eight sets of two units, it was easy to carefully place the taped units and see how the model could be made of two-unit elements or four-unit elements, plus being able to be scaled up, in this case to 12-unit strips.
|
| Hollow Experiment |
|
These Four-Unit Elements proved very versatile. The hollow idea was put aside for another time, maybe as a lamp. |
| Start Again From Scratch |
|
Sometimes the many choices are just too confusing and it's easier to demolish and start again. Particularly when the units are all joined just with masking tape and gravity. |
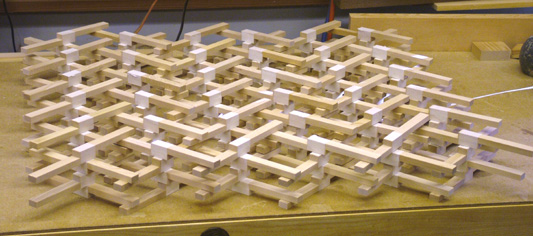
| Two Complete Double Layers |
|
This is now two complete double layers, but they are still just joined with masking tape and gravity so it is still easy to rearrange units. There are enough pieces now to determine whether the idea will work well, and it does look promising. |
| Estimating Wood Needed |
|
Once the design is decided on, the next problem is to be sure there will be enough wood to make it. Sometimes the proposed height or width of the sculpture can be easily changed to allow for insufficient material, but sometimes (like with Big Data)removing only one piece could mean removing two layers of the sculpture (to maintain symmetry), which makes me want to be very careful about discarding pieces prematurely. It's one thing to measure the amount of available wood, but then allowance has to be made for pieces that can't be used because of blemishes, cracks, insufficient width or length of the last piece, etc. Some pieces are perfect, and others are almost perfect, but have problems that can be ignored by careful placement, e.g. putting a bad piece on the bottom vs the top, or pointing it into the center of the sculpture instead of toward the surface. |
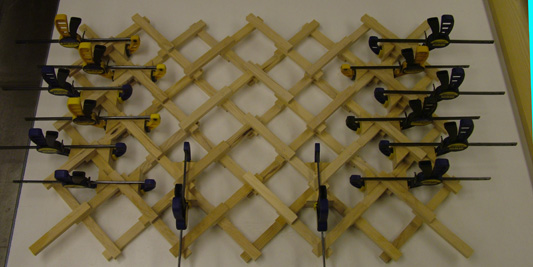
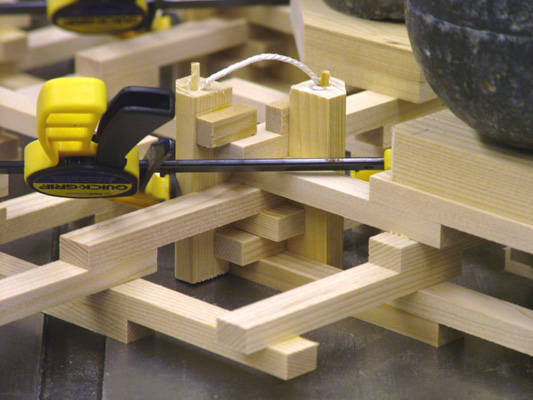
| First Layer Is Most Important |
|
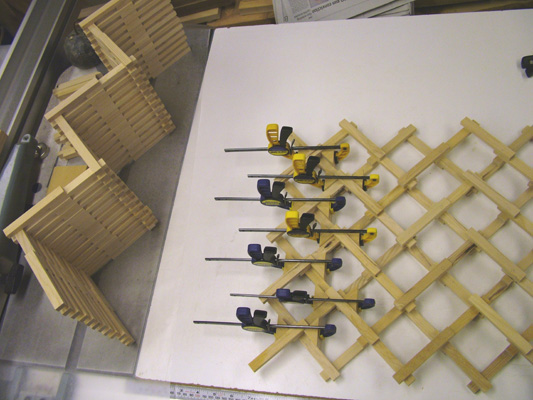
Getting ready to glue is the most time-consuming part of assembly. Notice that all the masking tape has been removed. The clamps are in place as a check on alignment. The pieces are kept perpendicular by corner blocks that the clamps squeeze. Several blemished pieces can be seen here, but they will be invisible once the next layer is in place. |
|
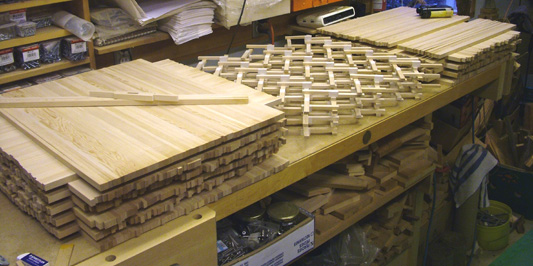
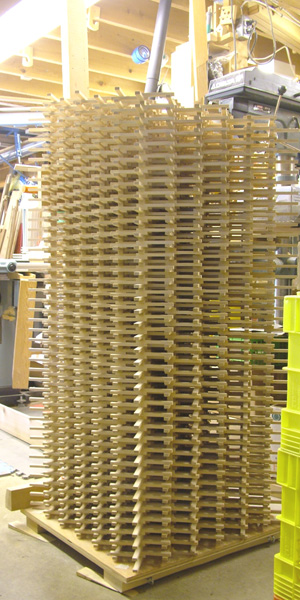
Stack of 12 Glued Hex-zag Strips ready for Placement |
|
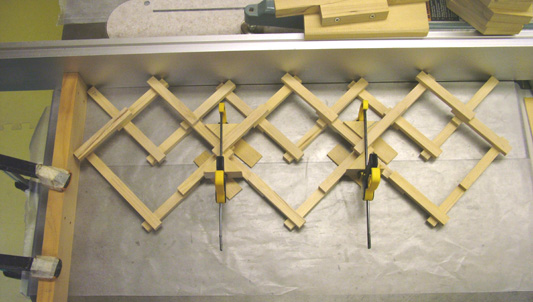
The 12-Unit zig-zag strips are now ready for test-assembly The right-angle wedges (being squeezed by the clamps) work, and it's getting hard to find reasons to further postpone the start. |
| Accurate Placement |
|
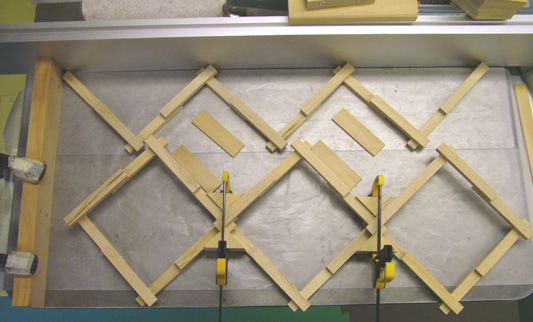
Still more testing for alignment before it can be assumed that gluing should start. |
| Tablesaw Fence to Square |
|
The tablesaw and fence made alignment much easier. |
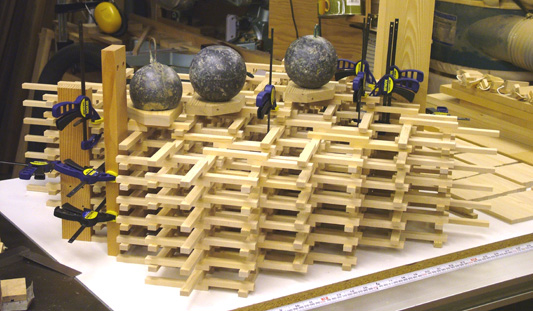
| Lead Weights and Small Clamps |
|
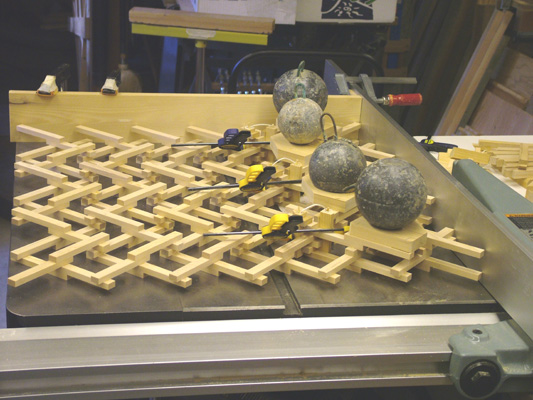
Everything has been mocked up several times so gluing the first layer went as planned and the second layer is now being glued and clamped. There are several kinds of small jigs and clamps for accurately placing the strips; the lead fishing weights keep the glued pieces in place. And their weight is distributed by the pieces of wood underneath them. The outside board clamped perpendicular to the fence is to keep the sculpture growing vertically by keeping the end corners of the outside units touching the perpendicular board and the tablesaw fence. |
| Jigs to Align Before Gluing |
|
The wood jigs are to keep joints aligned, and the strings to keep the jigs from falling down the holes once the sculpture is several layers high. |
| Only 5.5 ft To Go |

|
Once the first few layers have been assembled it was easier, but the increasing height made it necessary to keep making bigger jigs and to use the clamps more creatively. To the right of the fence a hex-zag strip is being glued and clamped with three lead weights |
| Alignment Now Gets Difficult |
|
As soon as one was noticed, any alignment error had to be compensated for by another `error` in the oppose direction. The sculpture is now too tall to use the tablesaw fence for alignment, so instead short boards are clamped to the growing sculpture. As the sculpture grows, those boards are replaced by taller boards. |
| Could Have Stopped Here |

|
The sculpture could have finished at this stage, but... |
| Also Could Have Stopped Here |
|
There's no telling where it `ought` to stop, but having started with something in mind, that seems like the best place to aim for (which coincidentally is the tallest it can be and still fit in the van). |
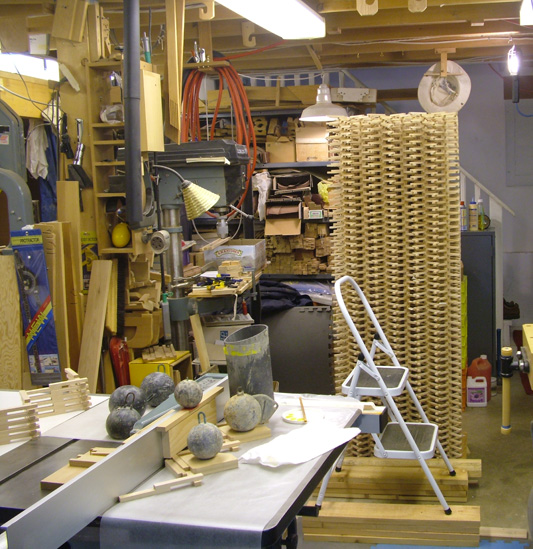
| Ladder Gets Another Step |
|
The other place to stop is where the sculpture could still make it out of the basement door, and into the van. The real place that made stopping imperative was when there was no longer any headroom. Putting boards under the step ladder added a bit more height but at the expense of making the bottom step less than safe. |
| Not Too Tall to Clear Doorway |
|
| It was easy enough for two people to move Big Data out of the basement, up the hill and around the house, and back indoors to the studio. Getting it back out of the house, horizontal and into the van will be another story. |